新版ASP.NET改採OWIN架構,Middleware概念讓Request/Response處理流程變得模組化,允許抽換自由組裝,身分驗證也變得極富彈性,IIS時代ASP.NET只有匿名、Basic、Windows幾種選擇,改用OWIN後,整合Google、Facebook、Twitter、Microsoft Account… 等OAuth登入服務不再是難事,還有現成元件可用,輕輕鬆鬆實現Google、FB登入。(關於OAuth,小朱有系列文章介紹,包含原理與OAuth Client實作細節)
要做到Google、FB登入,使用ASP.NET 4.5.2的MVC專案樣版是捷徑,專案本身即內建Google、Facebook、Twitter、Microsoft登入整合功能。
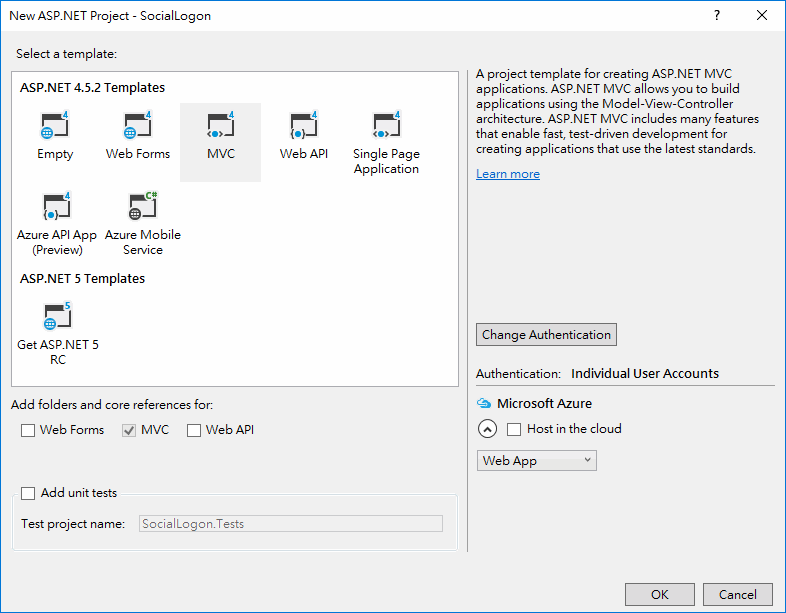
新増專案時,Authentication選項預設為Individual User Accounts,採用ASP.NET自家的Membership機制,且支援使用Facebook、Twitter、Google、Microsoft帳號登入。

啟用外部帳號登入需修改程式碼,開關藏在App_Start/Startup.Auth.cs中:
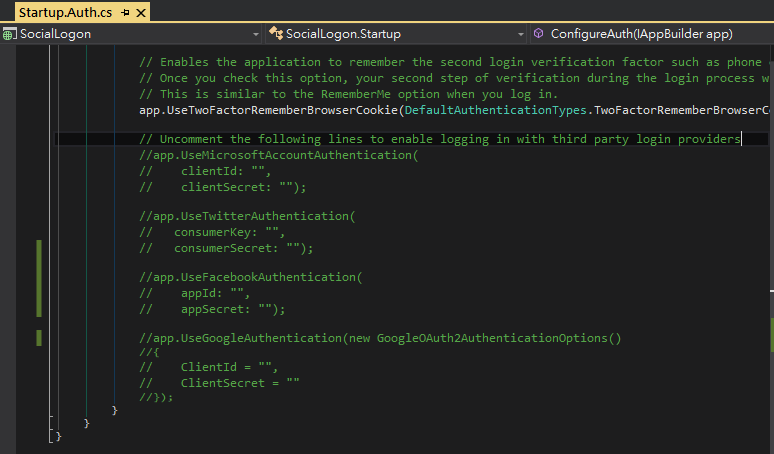
有四段被註解掉的程式碼,分別是MicrosoftAccount、Twitter、Facebook跟Google的身分驗證設定,移除註解填入各家要求的API Key及Secret即可啟動,之後登入畫面會多出已啟用帳號服務的登入鈕,只要API相關設定妥當,按鈕後網頁會導向Google、FB網站,待使用者完成登入並授權後再回到MVC網站,ASP.NET端取得使用者的Google、FB帳號資料,再與系統自己的使用者資料結合完成身份識別,免除管理帳號密碼的負擔,非常方便。

感覺是小菜一碟,ASP.NET端只要填兩個值就搞定,但上面提到「只要API相關設定妥當」這句話暗藏玄機。因為缺乏經驗,加上網路服務改版迅速,現況與爬文所得常有出入,摸索好一陣子我才搞定Google API,而在整合FB花的時間更是可觀… 整理攻略如下,希望能幫大家節省一點時間。(ASP.NET官網上有篇文章介紹得挺詳細,但文章寫於2015年4月,有些地方已有變化)
這篇先介紹登入Google登入。
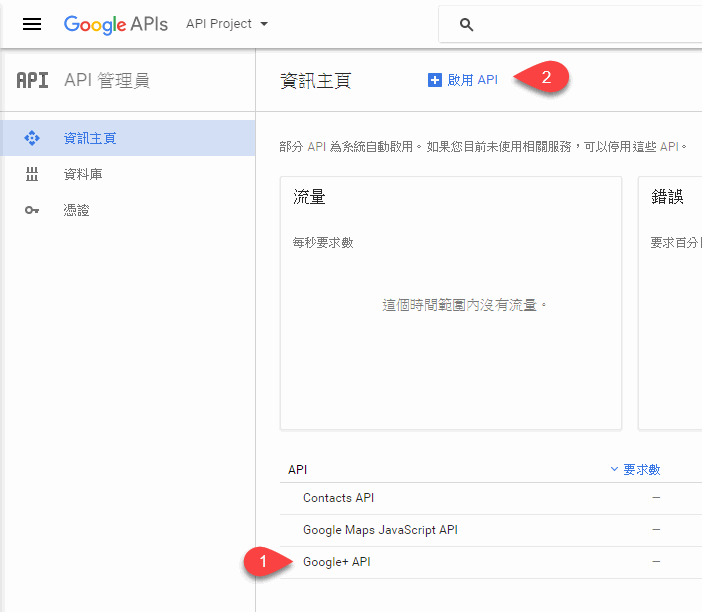
Google API Key要到Google API Console申請,第一件事請確定資訊主頁的API清單中有「Google+ API」,若沒有請使用上方的「啟用API」鈕新増。(一時糊塗,我在此挨了悶棍)
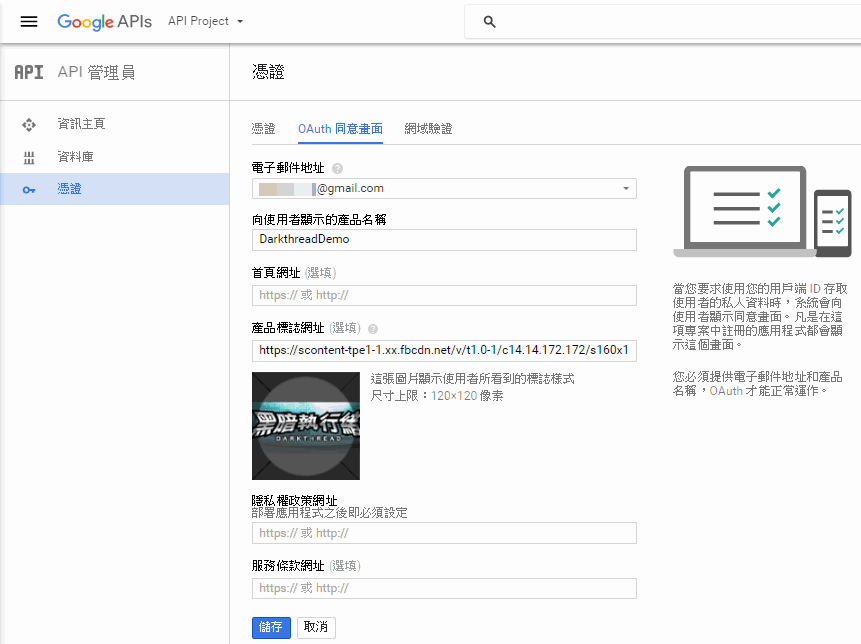
接著到「憑證」區,建議先設定「OAuth同意畫面」,填寫要顯示在授權網頁的資訊:
下一步,「建立憑證」,類別選「OAuth用戶端ID」:

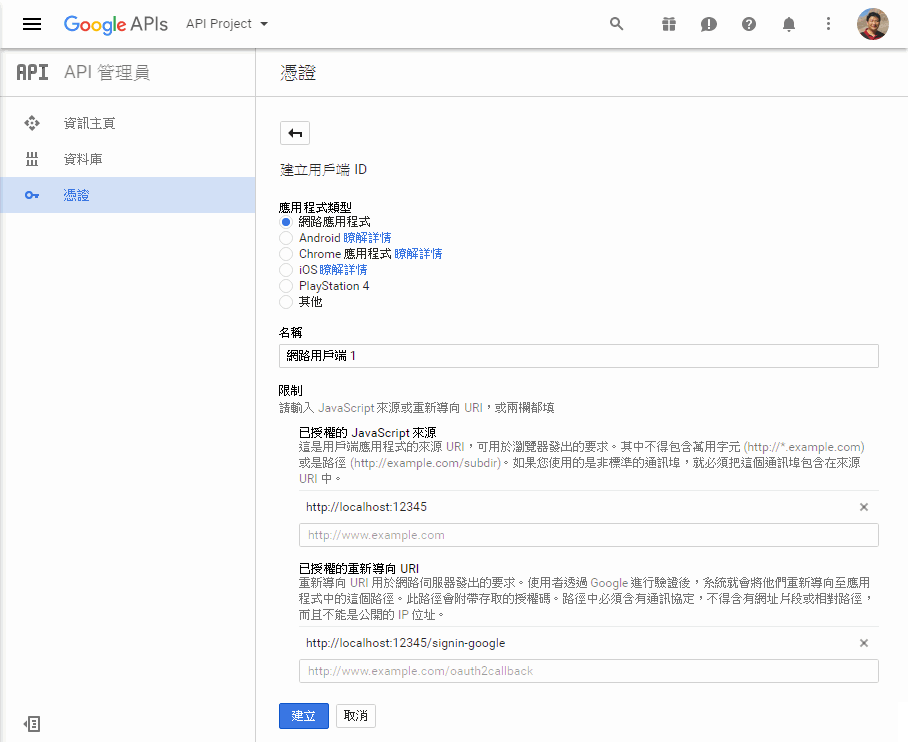
在憑證設定畫面,應用程式類型請選「網路應用程式」,名稱無關緊要隨便敲,至於「已授權的JavaScript來源」要填入網站URL(不含路徑,localhost也接受),「已授權的重新導向URL」則填網站URL加上"/signin-google":
憑證建立後,Google很貼心地顯示用戶端ID(ClientId)、用戶端密碼(ClientSecret)並有按鈕直接複製字串到剪貼簿:
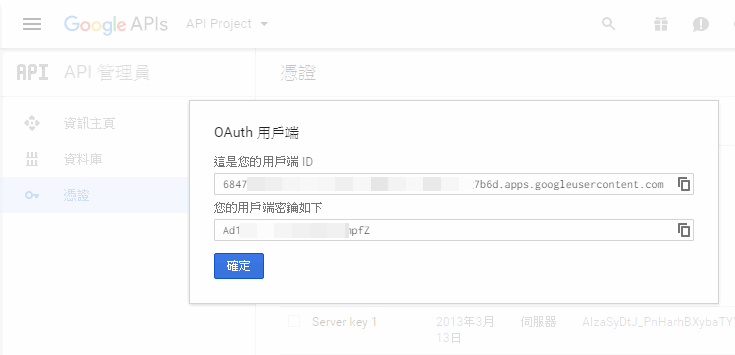
將ClientId及ClientSecret複製到Startup.Auth.cs:(提醒:實務開發時應由appSetting取值,不宜寫死)
app.UseGoogleAuthentication(new GoogleOAuth2AuthenticationOptions() { ClientId = "6847…7b6d.apps.googleusercontent.com", ClientSecret = "Ad1…pfZ"});
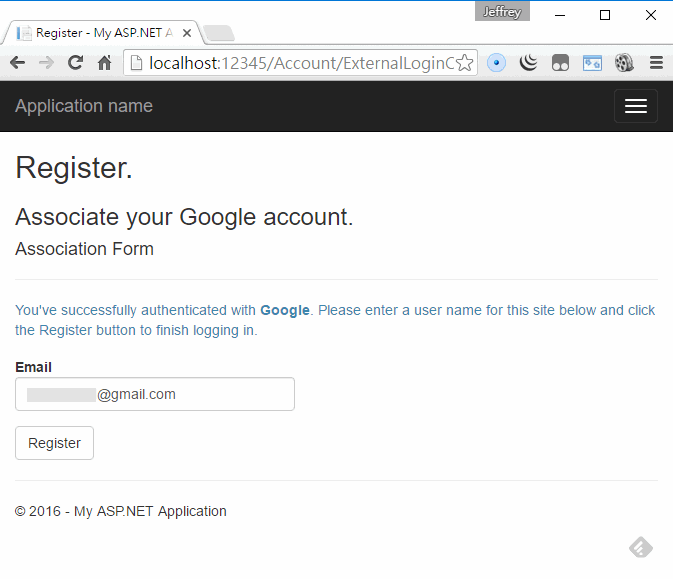
回到MVC網站的登入頁面,按下登入頁面的「Google」按鈕,網頁會切到Google登入及授權畫面:

按下「允許」回到MVC網站,系統已從Google取得Email資料,可直接註冊成會員。
註:測試過程學到一則經驗,「已授權的重新導向URL」在修改後似乎不會立刻生效,如在測試開發階段,重建憑證比較快。
下一集來談FB帳號整合,過程曲折許多,為了取得Email,我不但鑽了原始碼,還修改元件才過關,很硬斗!請待下回分解。